Pages

Showing posts with label DIY kaylee. Show all posts

Wednesday, September 19, 2012

The Big "Oops!"

You'll never believe what I just did. 

Okay, maybe you will.

To start at the beginning...

I decided when  I got up this morning to gray-wash the mirror in our dining room. Gray-wash... like white-wash but with gray paint.

It was a light gold color and to me seemed too "matchy-matchy" with the frames on the console table.

I taped off the inside of the mirror and mixed equals parts paint and water. {the paint I had left over from painting the upstairs bath}

I like the results. Extremely subtle. Not a big change... just no longer matchy-matchy. A little rustic.


Very subtle.

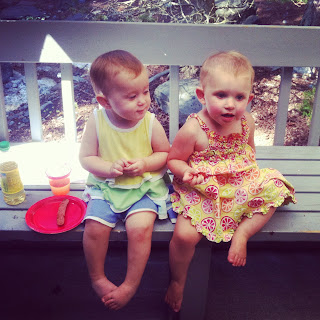
... and this cute little helper saw me snapping pictures and felt she should be in one.


Then the crazy happened. I just couldn't stop with the gray-wash. 

I ran to the living room and threw a tablecloth under our coffee table.

And officially ruined our coffee table.


It looks like we let Hadley paint it.


And there it is. 

So I think now we are going to turn it into a covered ottoman.  
Here's what were thinking:  Dear Lille Ottoman

Out of control today,


Friday, September 7, 2012

O Taste and See : Tutorial


"O taste and see that the LORD is good: blessed is that man that trusteth in Him." -Psalm 34:8

I love this verse. Particularly the reference to tasting
I like the idea of tasting His goodness. Sampling His sweet kindness. Savoring His love.
I love this verse.

And I've had the idea brewing for some time that this verse would find its place in my kitchen. 


This was really a matter of "Use what you already have."
I had this home decor plaque {or whatever you'd call it}

One coat of black latex paint and we're rippin' and roarin'.

I found a pear silhouette simply by 'bing-ing' "pear silhouette", printed, cut, and used to stencil. I used Americana Hauser Light Green.


Now came the longest portion of this project. First, picking the fonts I wanted. Second, using a Xacto knife to carefully cut out each letter to create a stencil. I can now tell you in all honesty it was absolutely not worth the money I saved taking the time to do this myself. Next time I will just order the vinyl! 


After laying out my stencil I painted over the letters using Americana's Bleached Sand. Its a nice, warm creamy color.

This is now one of the first things you see {read} when you enter the kitchen. 


I think this one little piece makes our house feel more like home. :)

Blessed and content,
Kaylee

Thursday, July 19, 2012

Catching Up: Projects

Where did we leave off? 


Moving, sick, Independence Day...


The weekend immediately following the holiday Hadley was tickled-pink to spend some time with her cousin and best bud, Noelle. {Known in this house as "Noellie-Bellie"} I like to refer to the girls as "the twins"... not because they look anything alike, but because they are only 6 days apart in birth.


Cousin Love


That same weekend Nick's parents were so gracious to come and help with a couple of projects. Well, two. How much can you really cram into one Saturday? {One day we'll test that}

I had asked Nick to build me a dining room table. A big, rustic ol' farm-house table. A mix between Pottery Barn's Benchwright and Cortona tables, with enough room to sit 8-10 people. I have dreams of the dinners, game nights, holidays, and high-chairs that will fill this space!

So my builder-husband and carpenter-father-in-law got right to work. And isn't she a beauty?


All ready to be sanded and stained! I love the character of the wood. Oh, and it seats 10-12. Happy wife here!

Unfortunately, I did not record the process... but you can find a simliar tutorial here

So, where is this monstrosity of a table gonna go? Well we're parking in our formal dining room. 


This room is one big canvas of walls and floor. But we've got some plans brewing.

Meanwhile... my mother-in-law and I were inside making some stripes happen. 


On the staircase wall -opposite the dining room- we measured up every 10 inches and then taped inside the not-to-be-painted  stripes with blue painters tape.

Next, using our fingers we ran some caulking {very little} along the the inside edges of the to-be-painted stripes. {Learned this trick from our builder} This part took the longest, but it was worth it. Doing this makes for sharp, clean lines once the tape is removed. 

We were very pleased with the results!
Hoping to find an old sideboard to replace the pitiful entry table.

I hear the baby crying, so that's it for today. We'll catch up more tomorrow.

Feeling inspired,
Kaylee


Friday, May 11, 2012

Memories for Mother's Day

"The best gifts are not ones you buy, but the memories that you make."


This year we wanted to do something special for Mother's Day.


Gifts for Grandma and Grammy made by Hadley. 
Finger- paintings and a photo capturing her joy in those moments of creativity.


 Hadley loved the paint. 


She loved squishing it between her fingers and then patting it on her legs.


She would spread it around, and then wipe some more on herself.
This was probably her favorite thing we've ever done. 


It was all giggles, squeals, and paint... everywhere.


Ready to see the winner???
-
-
-
-
-
-


Our sweet girl and those big blue eyes.


One finger-painting and photo framed for Grammy complete.

And for Grandma, one canvas finger-painting and framed photo.
Momma may have helped with this one. 
Just with some peel & stick letters.


This is without a doubt our favorite gift given. 

I will cherish the wonderful memories of this day.

And to all my Mom friends...
Happy Mother's Day!

Wednesday, May 9, 2012

the Green Lamp Story

I have been needing a new lamp for our guest room. I have been wanting a good green one.

This past weekend was a Do-It-Yourself/Honey-Do Saturday.

We {ok, Nick} finally got around to painting Hadley's dresser.

We stripped the table-top of our black office desk to stain the top, so our desk will look like this.

And we also went Goodwill hunting, which is where we picked up this saucy number....


Only $8.99?!


Okay, truth be told... I probably over-paid for Goodwill. But this will work perfectly.

{Drum roll, please}.......


One 80's Lamp-                   8.99
One can green spray paint- 3.00
Lamp Shade -                      Free {already had}
White Ribbon-                       .97 
Grand total of                   $11.97


And it looks like a million bucks! 


Or maybe just $50.


What do you think?


**Tip: To paint brass first slightly rough-up with some sand paper. Then spray {lightly} one layer... allow a few minutes to dry somewhat... repeat....and repeat...and.. well, you get the picture. This will allow the paint to coat evenly without running.


Feeling crafty,
Kaylee


Thursday, March 8, 2012

Painted Curtains and Pleated Flower Pillow


Lately I've been itchin' to revamp some things around here. Starting with the usually neglected room of the house: the Master bedroom. No one but us sees it, so its not on top of the priority list.

Loved Dear Lillie's Painted curtains. Little work; big impact! I took a stab at it...

We already had the white drapes so I  just had to pick up  the painter's tape, plastic drop cloth, and of course some paint. {*Mistake- not taking the color I wanted to match-up with. The first  two photos you'll see my tan/beige looks a little on the yellow side.}

First, I measured my stripes by marking every 12 inches, and then taping on the inside line of the white stripe. 

Then I laid  them out on the kitchen floor and started painting. The joints in our tile made this a little tricky, but it worked. {As you can see.. yellow. Repainted with the correct color the next morning}

Very pleased with the finished product!

Probably should have fixed the bottom of the curtains before I started snapping pictures. :)

{Click pictures for a larger view}


I also had this little number stuffed away in a closet. 

Using some fabric I picked up for $2 at Joanne's, an old bed sheet cut into strips and then sergered {serged? what the right word?}, and a broach; I recovered the pillow and somewhat followed this tutorial. {minus the tea-bags} This was a start-to-finish in one nap-time project! 

Two looks- $12! Well, it would  have been only $12  had I purchased the right color paint the first time. So let's say $12 + $9 mistake. Oops. Still... not too shabby.

This weekend my sweet DIY husband and carpenter father-in-law are building us a new bed! Or headboard. Which ever they realistically have time to complete. 
Here is the look we like:


Happy sunny Thursday!

LinkWithin

Related Posts Plugin for WordPress, Blogger...